QIRX Remote User Guide
This page is a guide describing the features of the QIRX Remote on a client device, like a smartphone or
a tablet. All screenshots are from an iphone8 or an iPad. In the Appendices, necessary modifications
of the qirxConsole.config file are described.
This version of QIRX Remote is still in an experimental state.
Prerequisite
To be able to start here, the server side setup must have been accomplished successfully, and the Kestrel server must be running.
If necessary, please go back the Setup page.
Startup
Please enter the IP Address and port number into the address field on your browser.
Both, IP address and port number must match the one where your Kestrel web server is listening. As described on the
QIRX Remote Setup page, this info is contained in the file
Here on my system, the address line reads
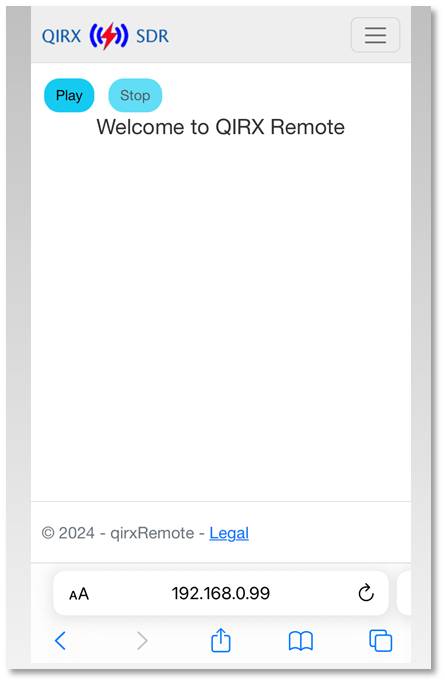
After filling the address field, the "Welcome" screen should show up on your device:
appsettings.json.
Here on my system, the address line reads
http://192.168.0.99:2222. In case you chose to work with a https certificate,
it starts with https://... instead of http://....
After filling the address field, the "Welcome" screen should show up on your device:
-
"Play", "Stop" buttons
They have no function here, but once a demodulator has been selected, they can be used to get the sound back on clicking "Play", after a page change.
-
Three-Bars
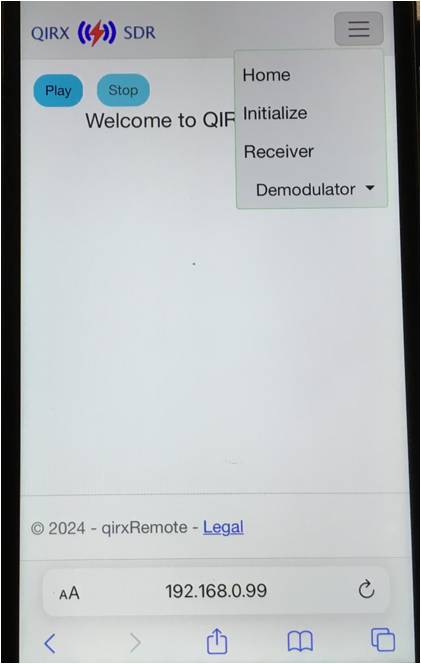
Clicking on the "three-bars box" in the top right corner, the menus pop up.
Initialize
The "Initialize" menu item always will be the first action to take after startup.
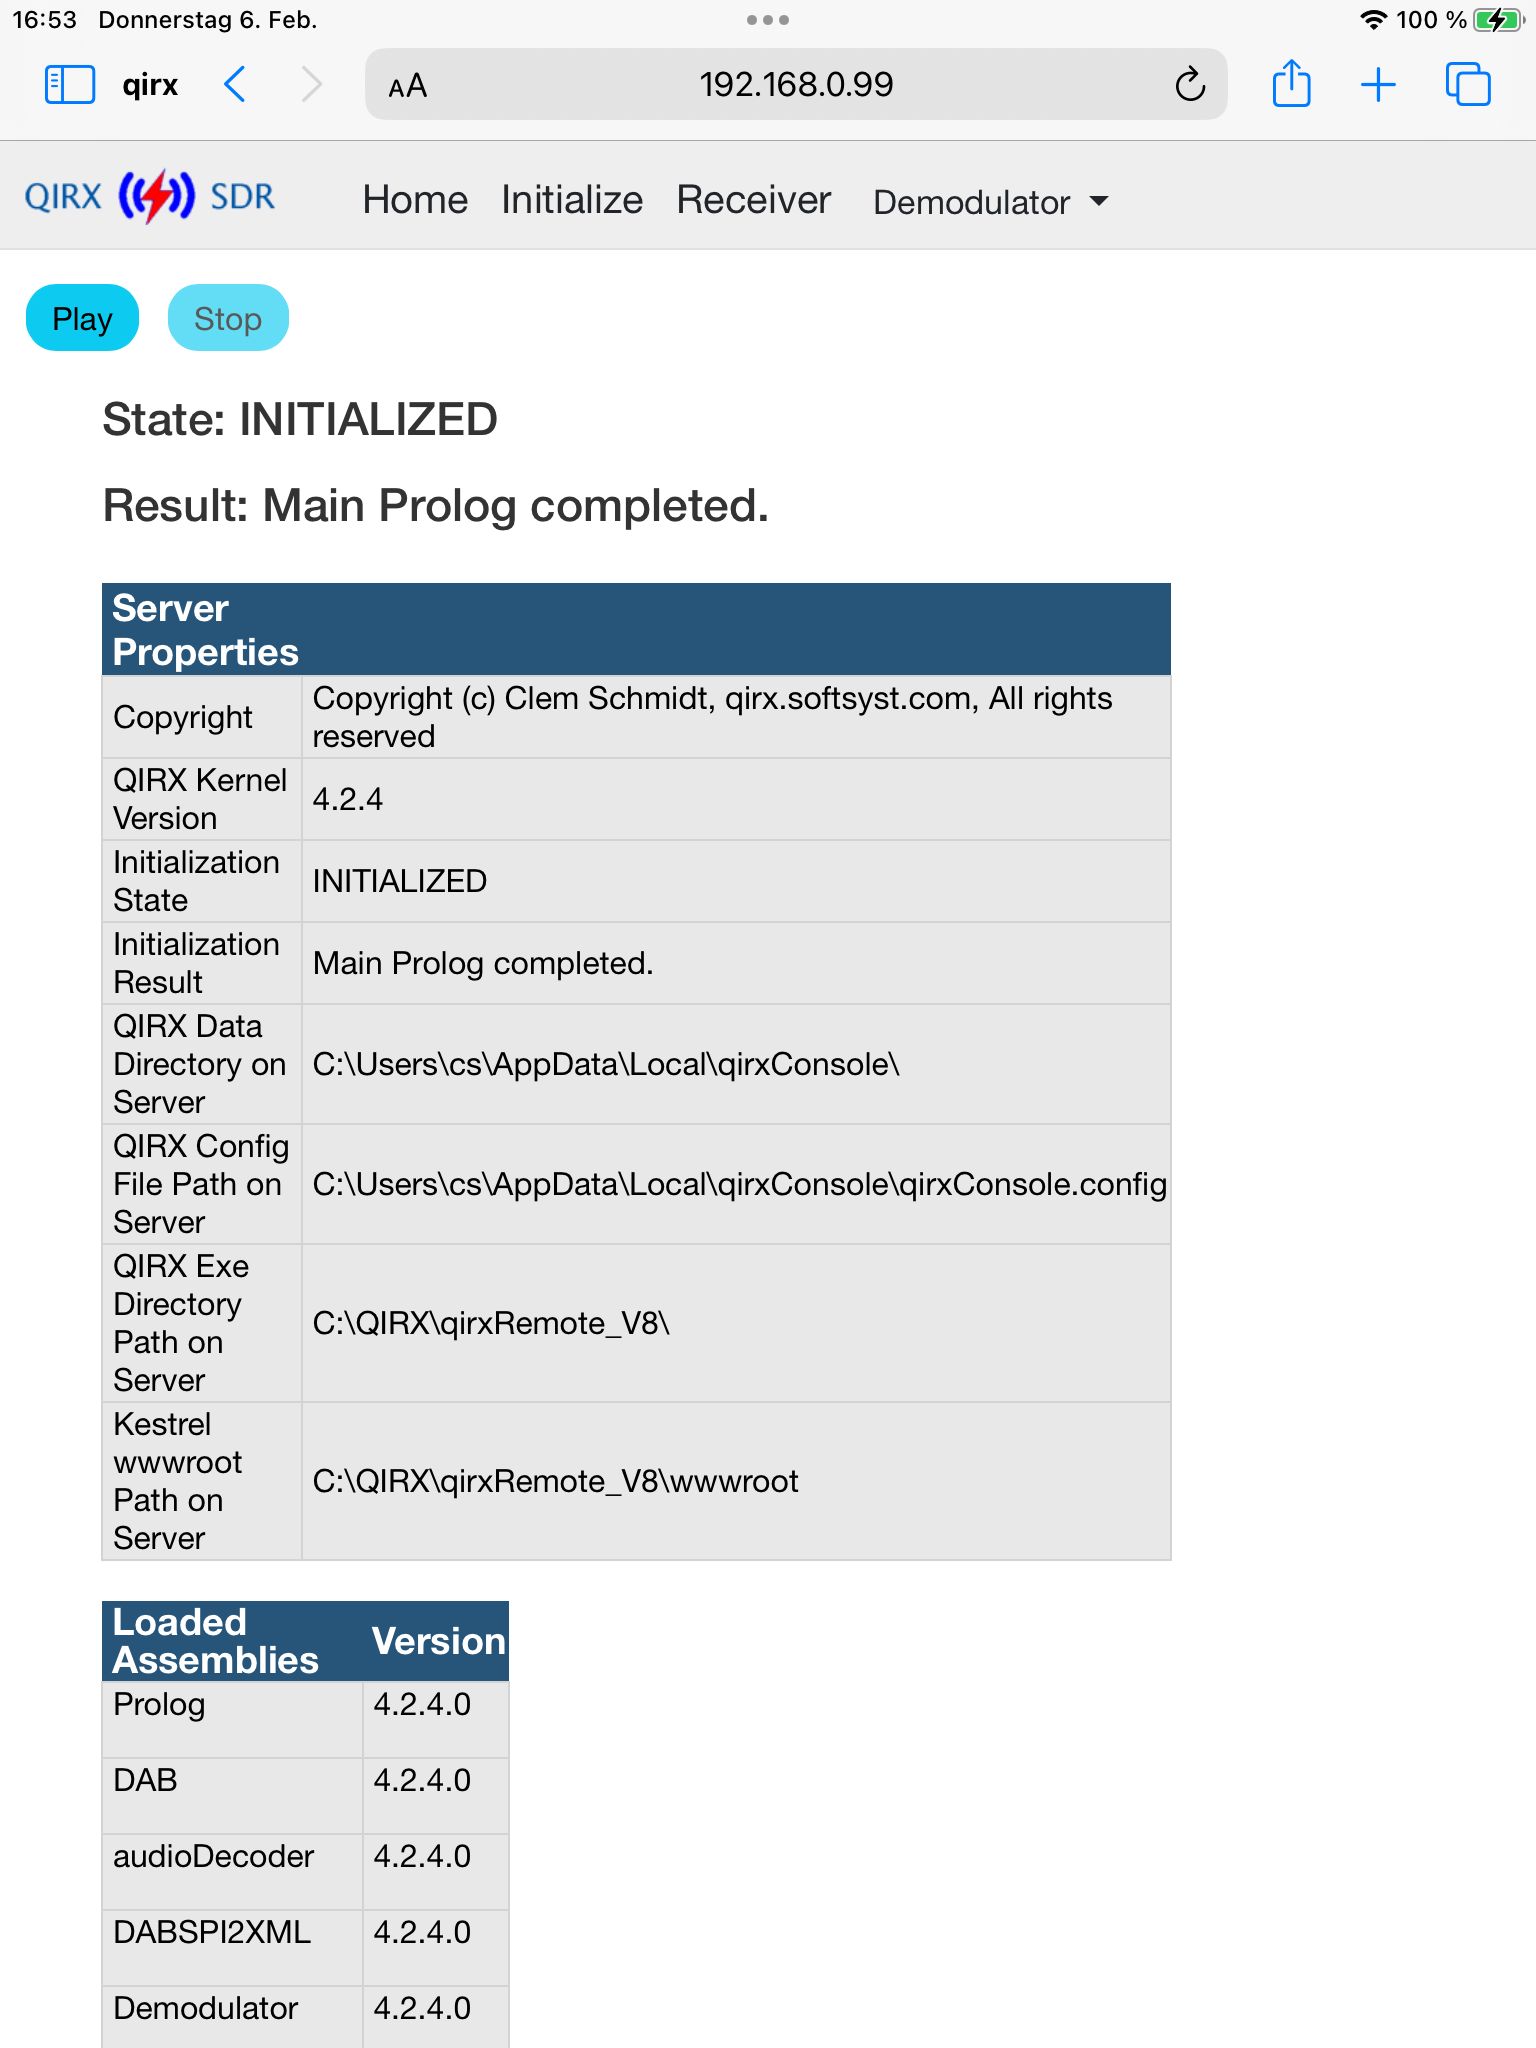
It performs initialization actions for the QIRX Kernel. Its response is some information
about paths on your PC which might sometimes be interesting for you. The screenshot is from my iPad.
For having the complete width on a smaller screen it needs to rotate it into landscape
instead of portrait screen layout.
Receiver Selection
To start a receiver the "Receiver" menu item must be activated:
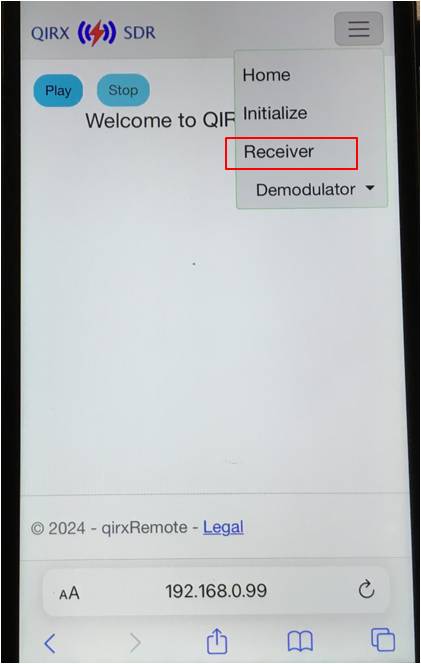
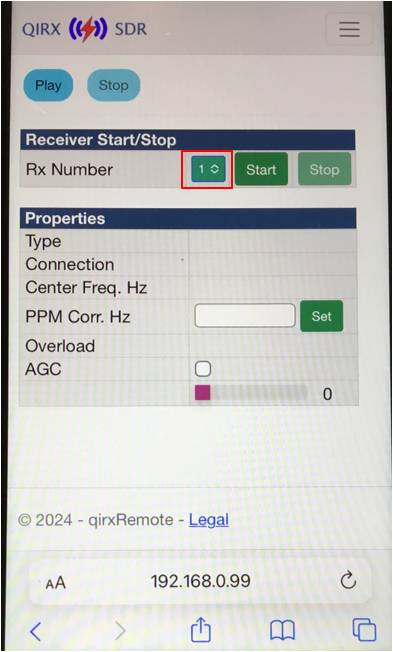
In the drop-down box indicated by the red frame, one of three possible receivers can be selected. After a fresh installation, when no
qirxConsole.config file was present, all three receivers are of the RTL-SDR type. How to change the
config file to enable other type of receivers like one of the RSP devices or an Airspy, will be shown in the
appendix of this page.
The receiver page offer the following possibilities:
-
Rx Number
Receiver stopped: Drop-down box and "Start" button are active, "Stop" button is grayed.
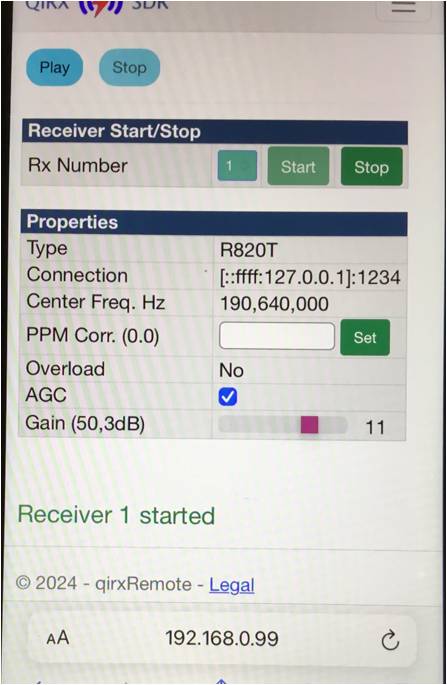
Receiver started: Drop-down box and "Start" button are grayed, "Stop" button is active. -
Type
Field is read-only, showing the type of the receiver, like R820T in the example screenshot. -
Connection
Field is read-only, showing IP address and port number where the rx driver program is listening -
Center Freq. Hz
Field is read-only, showing the frequency in Hz where the receiver is tuned to. On startup, this comes from the config file. -
PPM Corr.
Field is read-write. The text input field allows for entering a PPM correction value, to be set by clicking the "Set" button. The value returned from the device is the value in brackets, here (0.0). -
Overload
Field is read-only. "No" indicates no overload, "yes" indicates an overload situation detected by the receiver. -
AGC (Automatic Gain Control)
Field is read-write. A click into the checkbox toggles the AGC value, the response is shown as short time after detected by the receiver. -
Gain
Field is read-write. The gain can be changed when AGC is "off" with the red slider. The number beneath the slider is the "gain index", not the decibels. The gain value reported back by the device is shown in brackets, as dB.
Remark:
The above description differs from rx type to rx type. For instance, the Airspy rx does not offer a "PPM" command, thus will not react on an input into the corresponding field.
DAB Demodulators (currently DAB only)
Currently only the DAB demodulator can be selected, although the drop-down menu has been prepared
for the other demodulators too.
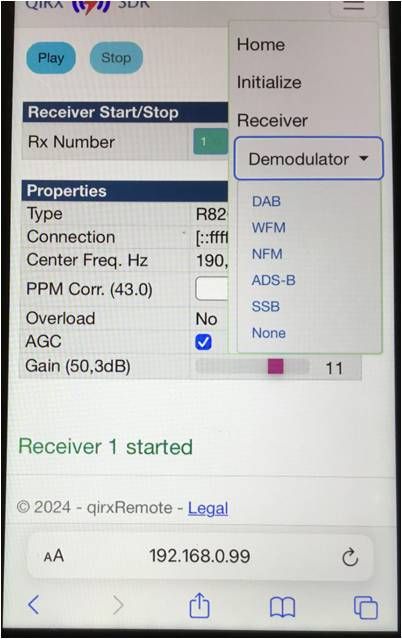
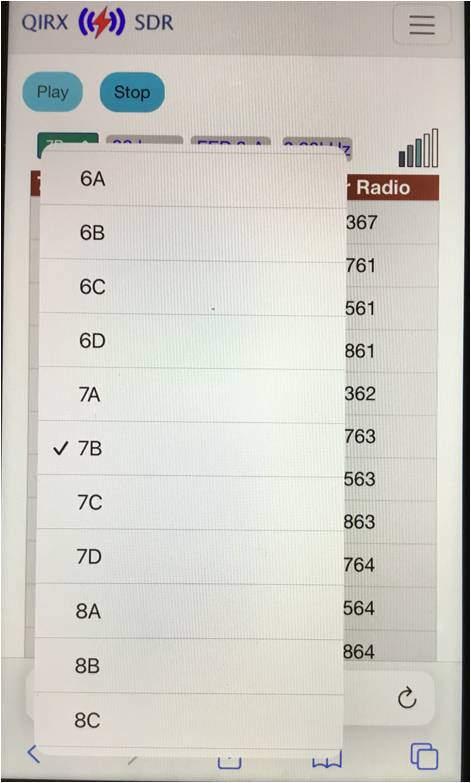
The leftmost picture shows how to select the DAB (or other, if avalilable) demodulator from the "receiver" page.
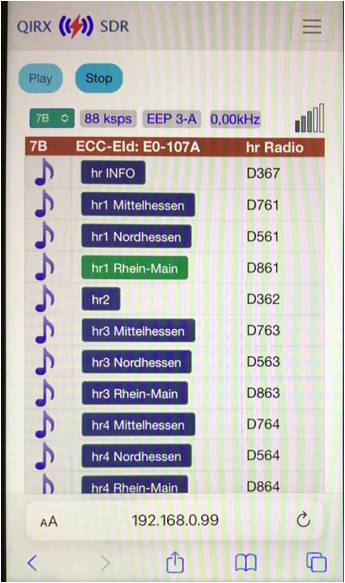
The middle picture shows the result for block 7B, which was the selected one in the config file. The green color means that a service has been selected, in this case automatically, from the config file.
The rightmost picture shows the list which opens when the "block" drop-down menu is activated.
To hear the music play, you should shortly tap somewhere into the "services" area.
The DAB pages offer the following possibilities:
Top Row
-
Block selector drop-down
Read-write: after opening the list, one of the entries can be selected, and will be shown on the drop-down. -
Bitrate
Read-only, showing the bitrate of the selected service -
Error Protection
Read-only, showing the error protection of the selected service -
Frequency correction
Read-only, showing the total frequency correction applied by the DAB synchronizer for this multiplex. This field can be influenced by selecting an appropriate PPM correction on the "receiver" menu. This is the reason why in the shown example it is zero, as a correction of 43ppm had been applied. -
Field strength bars
Read-only, showing the MER (modulation error ratio) in steps of 5dB. All bars open: MER > 0 and < 5dB, 1 bar filled: MER >5dB and < 10 dB, etc.
Block and Service Selection
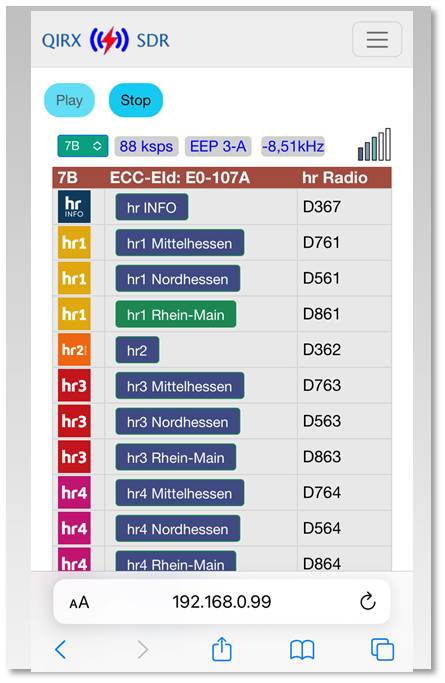
The leftmost picture shows a service playing on block 7B. Please note that the icons have been retrieved.
To change to another service in a different block, do the following:
- Select the green "Block selector" drop down menu on the top,
- Select the requested block from the opening list of all blocks,
- After the new services list is on the screen, tap on the service you like to select,
- After the selected service name appeared in green color, to be able to listen to the music, shortly tap on any point in the right gray part.
Slide Show, Dynamic Label
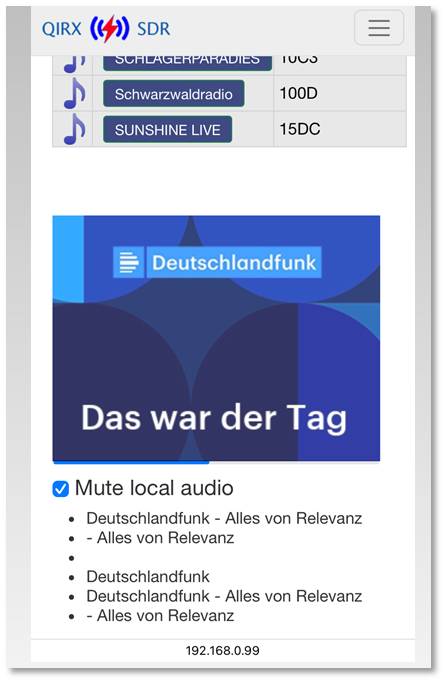
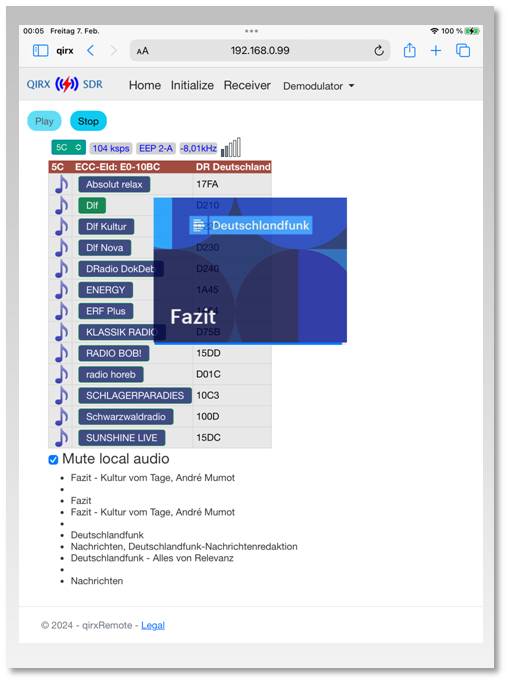
- The left picture shows how the slideshow picture is arranged below the service list. It features the known progress bar below the picture. This is the layout on a small screen. On a larger screen like the one of a tablet (here an iPad) it looks like on the right picture.
- 10 lines of the Dynamic Label text are arranged at the bottom of the page. The top entry is the most recent one.
Appendix A: The configuration file
Generally, standard QIRX and QIRX Remote get their configuration from an xml-formatted file.
The name and location of this file are different in both cases. In QIRX Remote, it is
While in standard QIRX most of the configuration changes can be done via the GUI, in QIRX Remote it is necessary (at least still currently) to do it manually. The file
The path to this file is
C:\Users\<your user name>\AppData\Local\qirxConsole\qirxConsole.config
While in standard QIRX most of the configuration changes can be done via the GUI, in QIRX Remote it is necessary (at least still currently) to do it manually. The file
qirxConsole.config
is a text file, which can be read and changed with every text editor like notepad or notepad++.
The path to this file is
C:\Users\<your user name>\AppData\Local\qirxConsole\qirxConsole.config
Appendix B: Receiver Type
Per default all three possible receivers are configured as RTL-SDR devices, thus Rx2 and Rx3 are assumed to be changed
to other device types. The
The path to this file is
Airspy
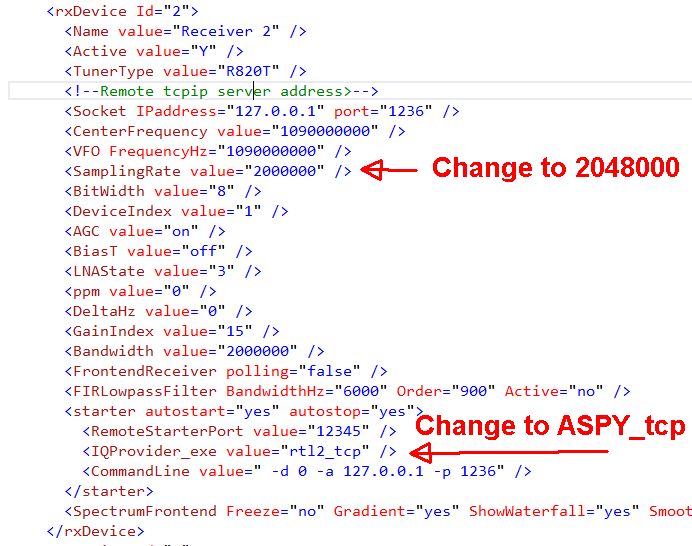
If Receiver #2 should start the airspy driver ASPY_tcp.exe, the picture shows the two necessary changes. The change in the sampling rate is necessary as this default config file is the same as the one from standard QIRX, which suggests for Rx2 an ADS-B demodulator with its 2000000 sps sampling rate.
The second change is to tell the software to use the ASPY_tcp driver.
These changes are stored in the config file, thus the changes need to be made only once. Other entries are changed automatically, e.g. the tuner type will have a "14" instead of "Airspy" due to a strange peculiarity of the C# language.
qirxConsole.config can be deleted any time and is automatically
created with its default values after the initialization. If you delete it, have your license key ready to
introduce it, as shown in the Setup section.The path to this file is
C:\Users\<your user name>\AppData\Local\qirxConsole\qirxConsole.config
Airspy
If Receiver #2 should start the airspy driver ASPY_tcp.exe, the picture shows the two necessary changes. The change in the sampling rate is necessary as this default config file is the same as the one from standard QIRX, which suggests for Rx2 an ADS-B demodulator with its 2000000 sps sampling rate.
The second change is to tell the software to use the ASPY_tcp driver.
These changes are stored in the config file, thus the changes need to be made only once. Other entries are changed automatically, e.g. the tuner type will have a "14" instead of "Airspy" due to a strange peculiarity of the C# language.
SDRplay RSP devices
For the RSP devices, there is only one change necessary if Rx1 or Rx3 is to be used:
The entry in the IQProvider_exe value needs to be RSP3_tcp.
If Rx#2 is to be used, the above mentioned change of the sample rate entry to 2048000 is also necessary for DAB.
For the RSP devices, there is only one change necessary if Rx1 or Rx3 is to be used:
The entry in the IQProvider_exe value needs to be RSP3_tcp.
If Rx#2 is to be used, the above mentioned change of the sample rate entry to 2048000 is also necessary for DAB.
Appendix C: UDP ports for communcation with qirx_audio
When using the DAB demodulator, the decoding of the AAC audio samples into PCM16 samples is performed in a
separate executable, called qirx_audio. The PCM16 samples are sent back to the QIRX Kernel which passes them
on to the QIRX Remote server software on their way to the mobile device.
For the communication, the UDP protocol has been selected, using four consecutive ports. The lowest of these four ports (called the "base port"), can be set in the configuration file. To ensure independence of the audio for standard QIRX and QIRX Remote running at the same time, it is strongly recommended to do so.

The indicated value of 8766 is the standard value used and should be changed.
For the communication, the UDP protocol has been selected, using four consecutive ports. The lowest of these four ports (called the "base port"), can be set in the configuration file. To ensure independence of the audio for standard QIRX and QIRX Remote running at the same time, it is strongly recommended to do so.
The indicated value of 8766 is the standard value used and should be changed.
Check it
The best method to check whether the changed ports are used is to inspect the output of qirx_audio.exe on the command line.
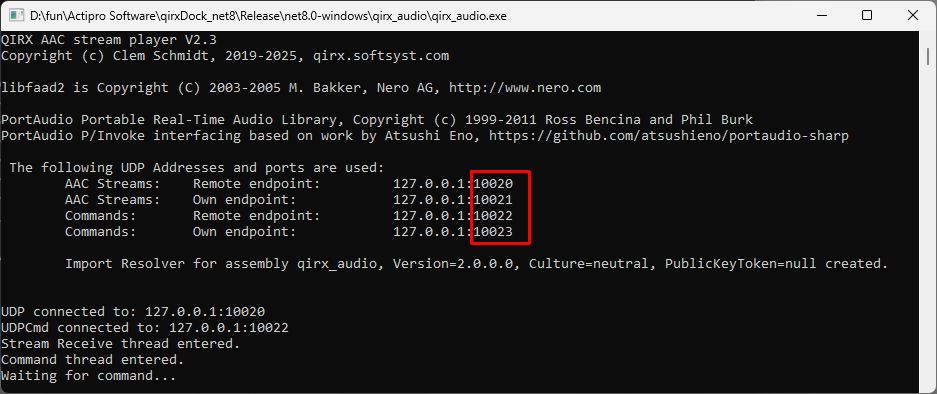
In this example, the base port had been changed from 8766 to 10020 in the qirxConsole.config file.
Remark 1
The described simultaneous and independent audio output from standard QIRX and QIRX Remote is in standard QIRX realized in versions from V4.3.1 on. Earlier versions use the base port of 8766 hard-coded.
Remark 2
While the QIRX Kernel is reading the base port from the config file, qirx_audio gets it as a command-line parameter, when being started automatically by the QIRX Kernel: qirx_audio.exe -p10002
This would use 10020 as the base port.
The best method to check whether the changed ports are used is to inspect the output of qirx_audio.exe on the command line.
In this example, the base port had been changed from 8766 to 10020 in the qirxConsole.config file.
Remark 1
The described simultaneous and independent audio output from standard QIRX and QIRX Remote is in standard QIRX realized in versions from V4.3.1 on. Earlier versions use the base port of 8766 hard-coded.
Remark 2
While the QIRX Kernel is reading the base port from the config file, qirx_audio gets it as a command-line parameter, when being started automatically by the QIRX Kernel: qirx_audio.exe -p10002
This would use 10020 as the base port.
Appendix D: License Key
Although this has been described in the "Setup" article, it is here repeated for completeness.
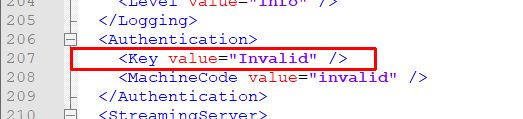
The picture shows you in the red box the line where you need to enter your license key. You find that line rather at the bottom.
In the
The picture shows you in the red box the line where you need to enter your license key. You find that line rather at the bottom.
In the
Key field, instead of "Invalid", please enter your license key, like "ABCDE-FGHIK-123XY-LMNOP".
The "MachineCode" entry is not necessary.