QIRX V4, V3 and V2 can exist side-by-side without interference, of course each using its own hardware. To run the V4, it is NOT necessary to first un-install the V3 of QIRX.
Non-QIRX Installs
-
Zadig Driver: RTL-SDR dongles are NOT
"plug and play" devices, they need a generic driver which can be installed by a special software called "Zadig".
If Zadig has not been run on your computer, the rtl_tcp and rtl2_tcp driver programs will NOT work.
The Zadig website allows you to download this installer and shows you how to make it work.
In case you have difficulties, here (Step 8 to Step 11) you find additional advice how to tackle them. -
DAB Database Driver: In case you are going to use the DAB demodulator, you MUST have installed the Microsoft (MS) database driver.
Although QIRX is using a local Excel file as its DAB database, it is accessed via the MS database driver. See "Database Driver Installation" below how to install it and/or check its presence.
Do not omit this step, as you might encounter errors or even crashes if you have not installed this driver before using DAB.
Remark: This step is only necessary once, and only for the DAB database. It is NOT necessary for the ADS-B aircraft database.
Database Driver Installation (for the DAB Database)
-
Step 1: Get the "Microsoft Access Database Engine 2010 Redistributable" file AccessDatabaseEngine_X64.exe.
You can either download it here from the Download page, or you
can get it directly from Microsoft.
Important: Make sure you download the 64-bit version, showing the _X64 suffix. The 32-bit version - without the _X64 suffix - will NOT work. -
Step 2: Install the Driver by double-clicking on the exe and following the instructions. In case an error message pops up telling you that your Excel is out of date, ignore it and install by
adding /passive as a commandline parameter, like so:
<your directory>\AccessDatabaseEngine_X64.exe /passiveAs an alternative, you might double-click on the provided install.bat file, doing the same. With the /passive parameter, the installer will not report success or failure.
-
Step 3: Check the success of the installation.
- Start the "Powershell" program. In case you don't know how to do it: Google is your friend.
- On the Powershell command line, enter the following line (without the quotes):
- "(New-Object system.data.oledb.oledbenumerator).GetElements() | select SOURCES_NAME, SOURCES_DESCRIPTION"
- With a successful installation, the Powershell output should contain the following line:
- Microsoft.ACE.OLEDB.12.0 Microsoft Office 12.0 Access Database Engine OLE DB Provider
- If this line does not show up, the driver has NOT been installed, and QIRX will not work as intended.
-
Step 4 Uninstallation (when it becomes necessary):
In the Windows "Settings, Apps", it is listed as "Microsoft Access database engine 2010".
You can unistall it in the usual way by clicking on it and selecting "Uninstall".
QIRX V4 Startup Step-By-Step
Remark: You may run these instructions equally well with only one or two instead of three receivers, with any rtl-sdr compatible dongle, or other supported hardware (currently sdrplays RSP devices and Airspy's Airspy Mini and R2 devices). For a guidance how to work with these receivers, please refer to the Setup page.
-
Step 1: Download QIRX V4, obtain a zip file with the QIRXV4xyz_Setup.msi. xyz is here a placeholder
for the actually downloaded version. Check the integrity of the file by comparing its SHA-1 hash with the SHA-1 hash value found
on the "Download" website. A simple and useful tool to calculate hashes is
HashCalc .
The result of the calculation with this tool looks similar to the following one:
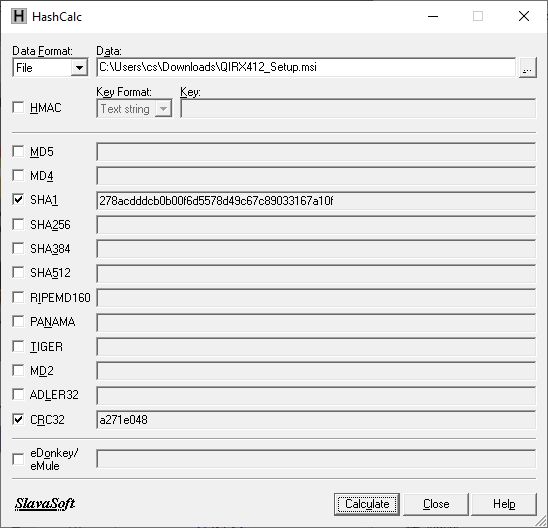
The number in the SHA-1 field must be identical to the one published on the "Download" page. If it is not, your download is corrupt. Do not try to use it. -
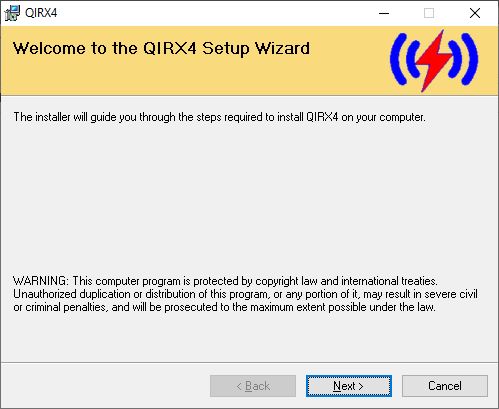
Step 2: Doubleclick on the downloaded .msi file. In case of an appearing warning, click "Run". The installer shows its inital screen.
In one of the installer screens, you can enter a directory of your choice to install the necessary executables. The usual Windows default is presented though and of course is a resonable choice.
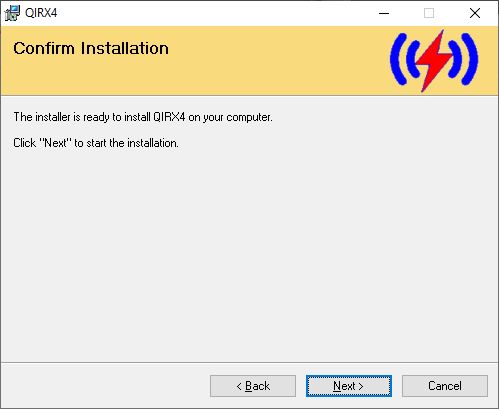
Now click "Next" until you arrive at the screen requesting you to start the installation. Click "Next.
 ....
....
-
Step 2.1: In case this installation should be not the first one with Version 4, you are asked whether the
installer should delete the old configuration file. If you decide to continue with your old config file, click "No".
In that case it will
not be necessary to enter your license code again.
If you decide to have a new config file created (when starting QIRX) then click "Yes. In that case you will need to enter your license code again (when starting QIRX). - Step 3: After the installation, a success screen is shown and the QIRX icon should be present on the desktop.
-
Step 4: Start qirx.exe from your desktop by double-clicking on its icon.
The data directory structure should be present in the usual application data folder, like e.g.
C:\Users\<your user name>\AppData\Local\qirx4\.
If this is not a first install, the files in these directories are untouched from previous QIRX runs.
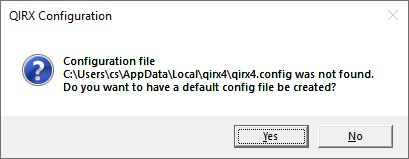
In case of a first install, or if you let the installer delete your old config file, the following should happen: A message box, asking if the missing config file is to be created. Click Yes.
-
Step 5: If this is your first start with V4 or if you had decided to have your old config file deleted, then you need to
enter your license code in the window now showing up:
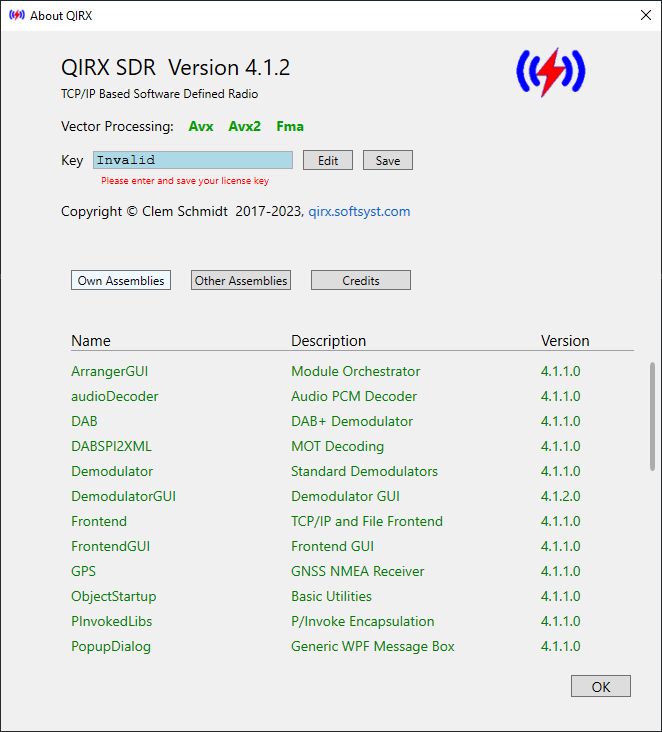
Please enter your license key into the "Key" field and click "Save". Click OK. Now, you might find your key in the qirx4.config file.
Remark: For this step to work properly, you must be connected to the internet. -
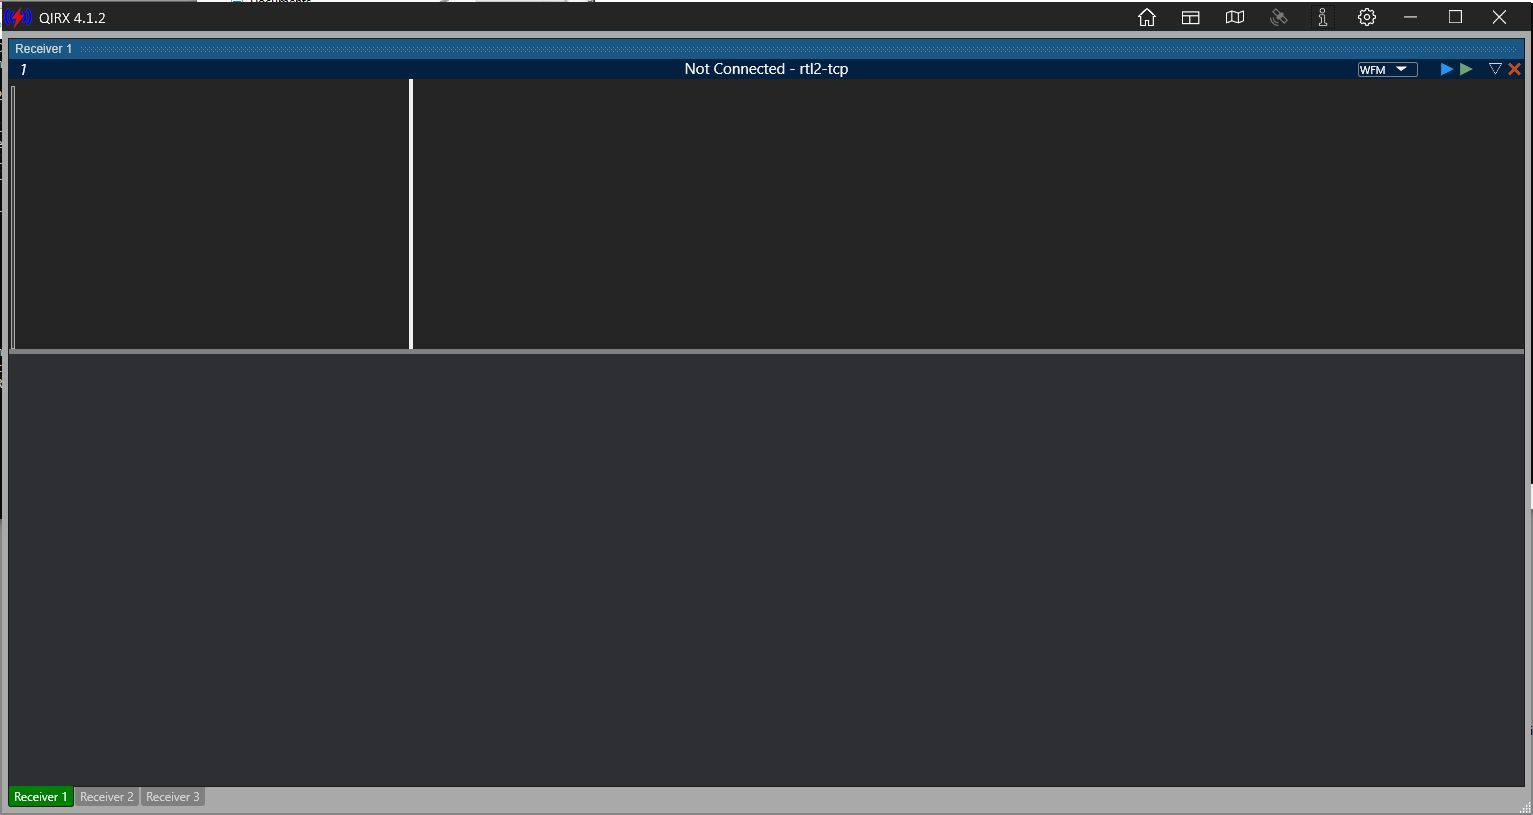
Step 6: The QIRX screen appears, ready to start a receiver:
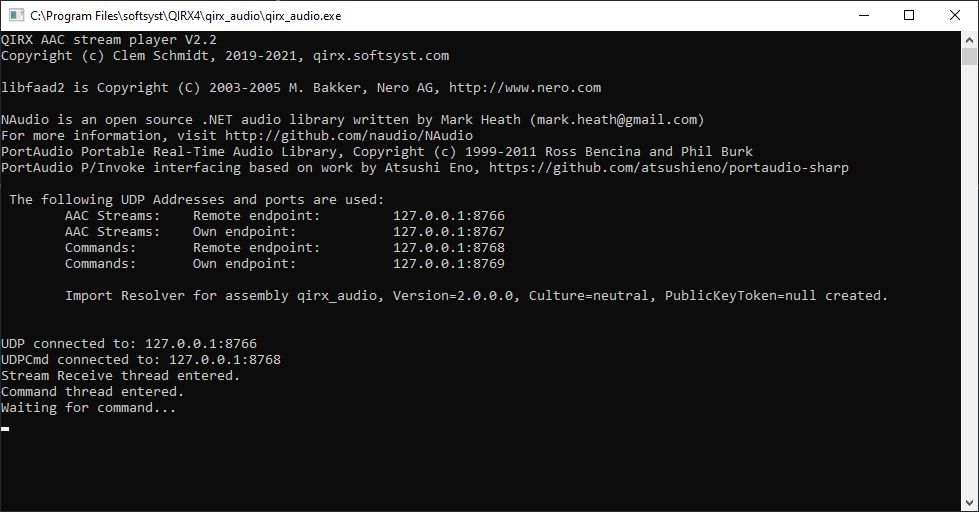
Before proceeding, you might check if the qirx_audio.exe has been started. It is responsible to convert the AAC audio produced by DAB+ into samples ready for an audio player. Due to licensing reasons, it resides in a separate exe. A command-line window should have been created (minimized), showing text similar like this:
QIRX has been pre-configured for the first use. You might check the initial configuration by clicking the "Setup" icon (gearwheel on the top row):
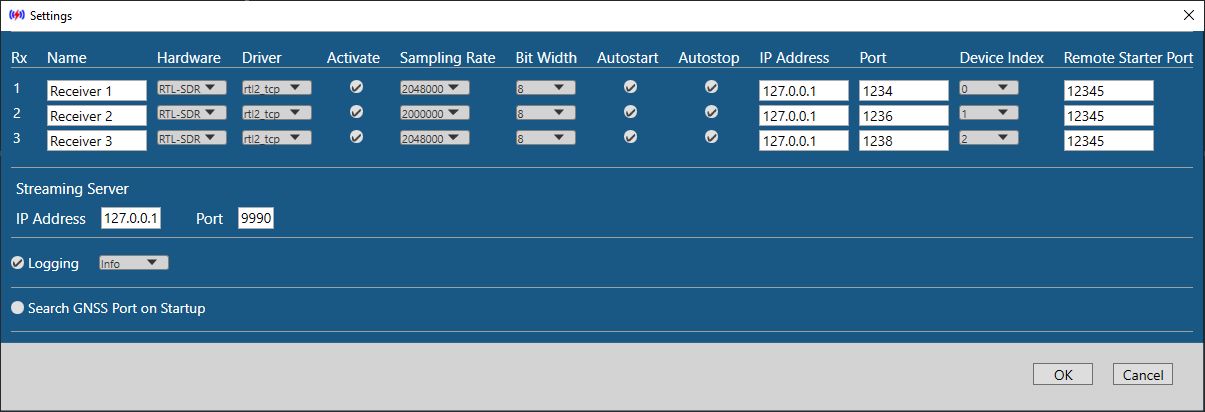
- The three receivers are numbered 1,2,3, their names written at the bottom of the QIRX window. A click on one of the tabs selects the corresponding receiver.
-
All three receivers use some RTL-SDR kind of hardware. These are selected as the default
because they are the most widely used ones.
For the selection of other hardware, look here.
Please not that Receiver 2 got a sampling rate of 2000000, to be used for ADS-B only.
-
Step 7: Hardware Setup
For the use of three locally connected receivers, you need three hardware devices connected via USB. In case you don't have sufficient USB ports available on your PC, you might use a USB hub.
A particularly useful hardware for such a multi-RX configuration is the "Kerberos" device available from rtl-sdr.com via Othernet. It contains four R820T2 equipped dongles in one metal case, has a connector for an additional 5V power supply being absolutely necessary for three devices, and a built-in USB hub. But please note that QIRX is not able to exploit its coherence features.
Remark: Kerberos got a successor, dubbed "Kerberos++" or KrakenSDR, containing five receivers and enhanced direction finding facilities.
The next picture shows my setup for three receivers:
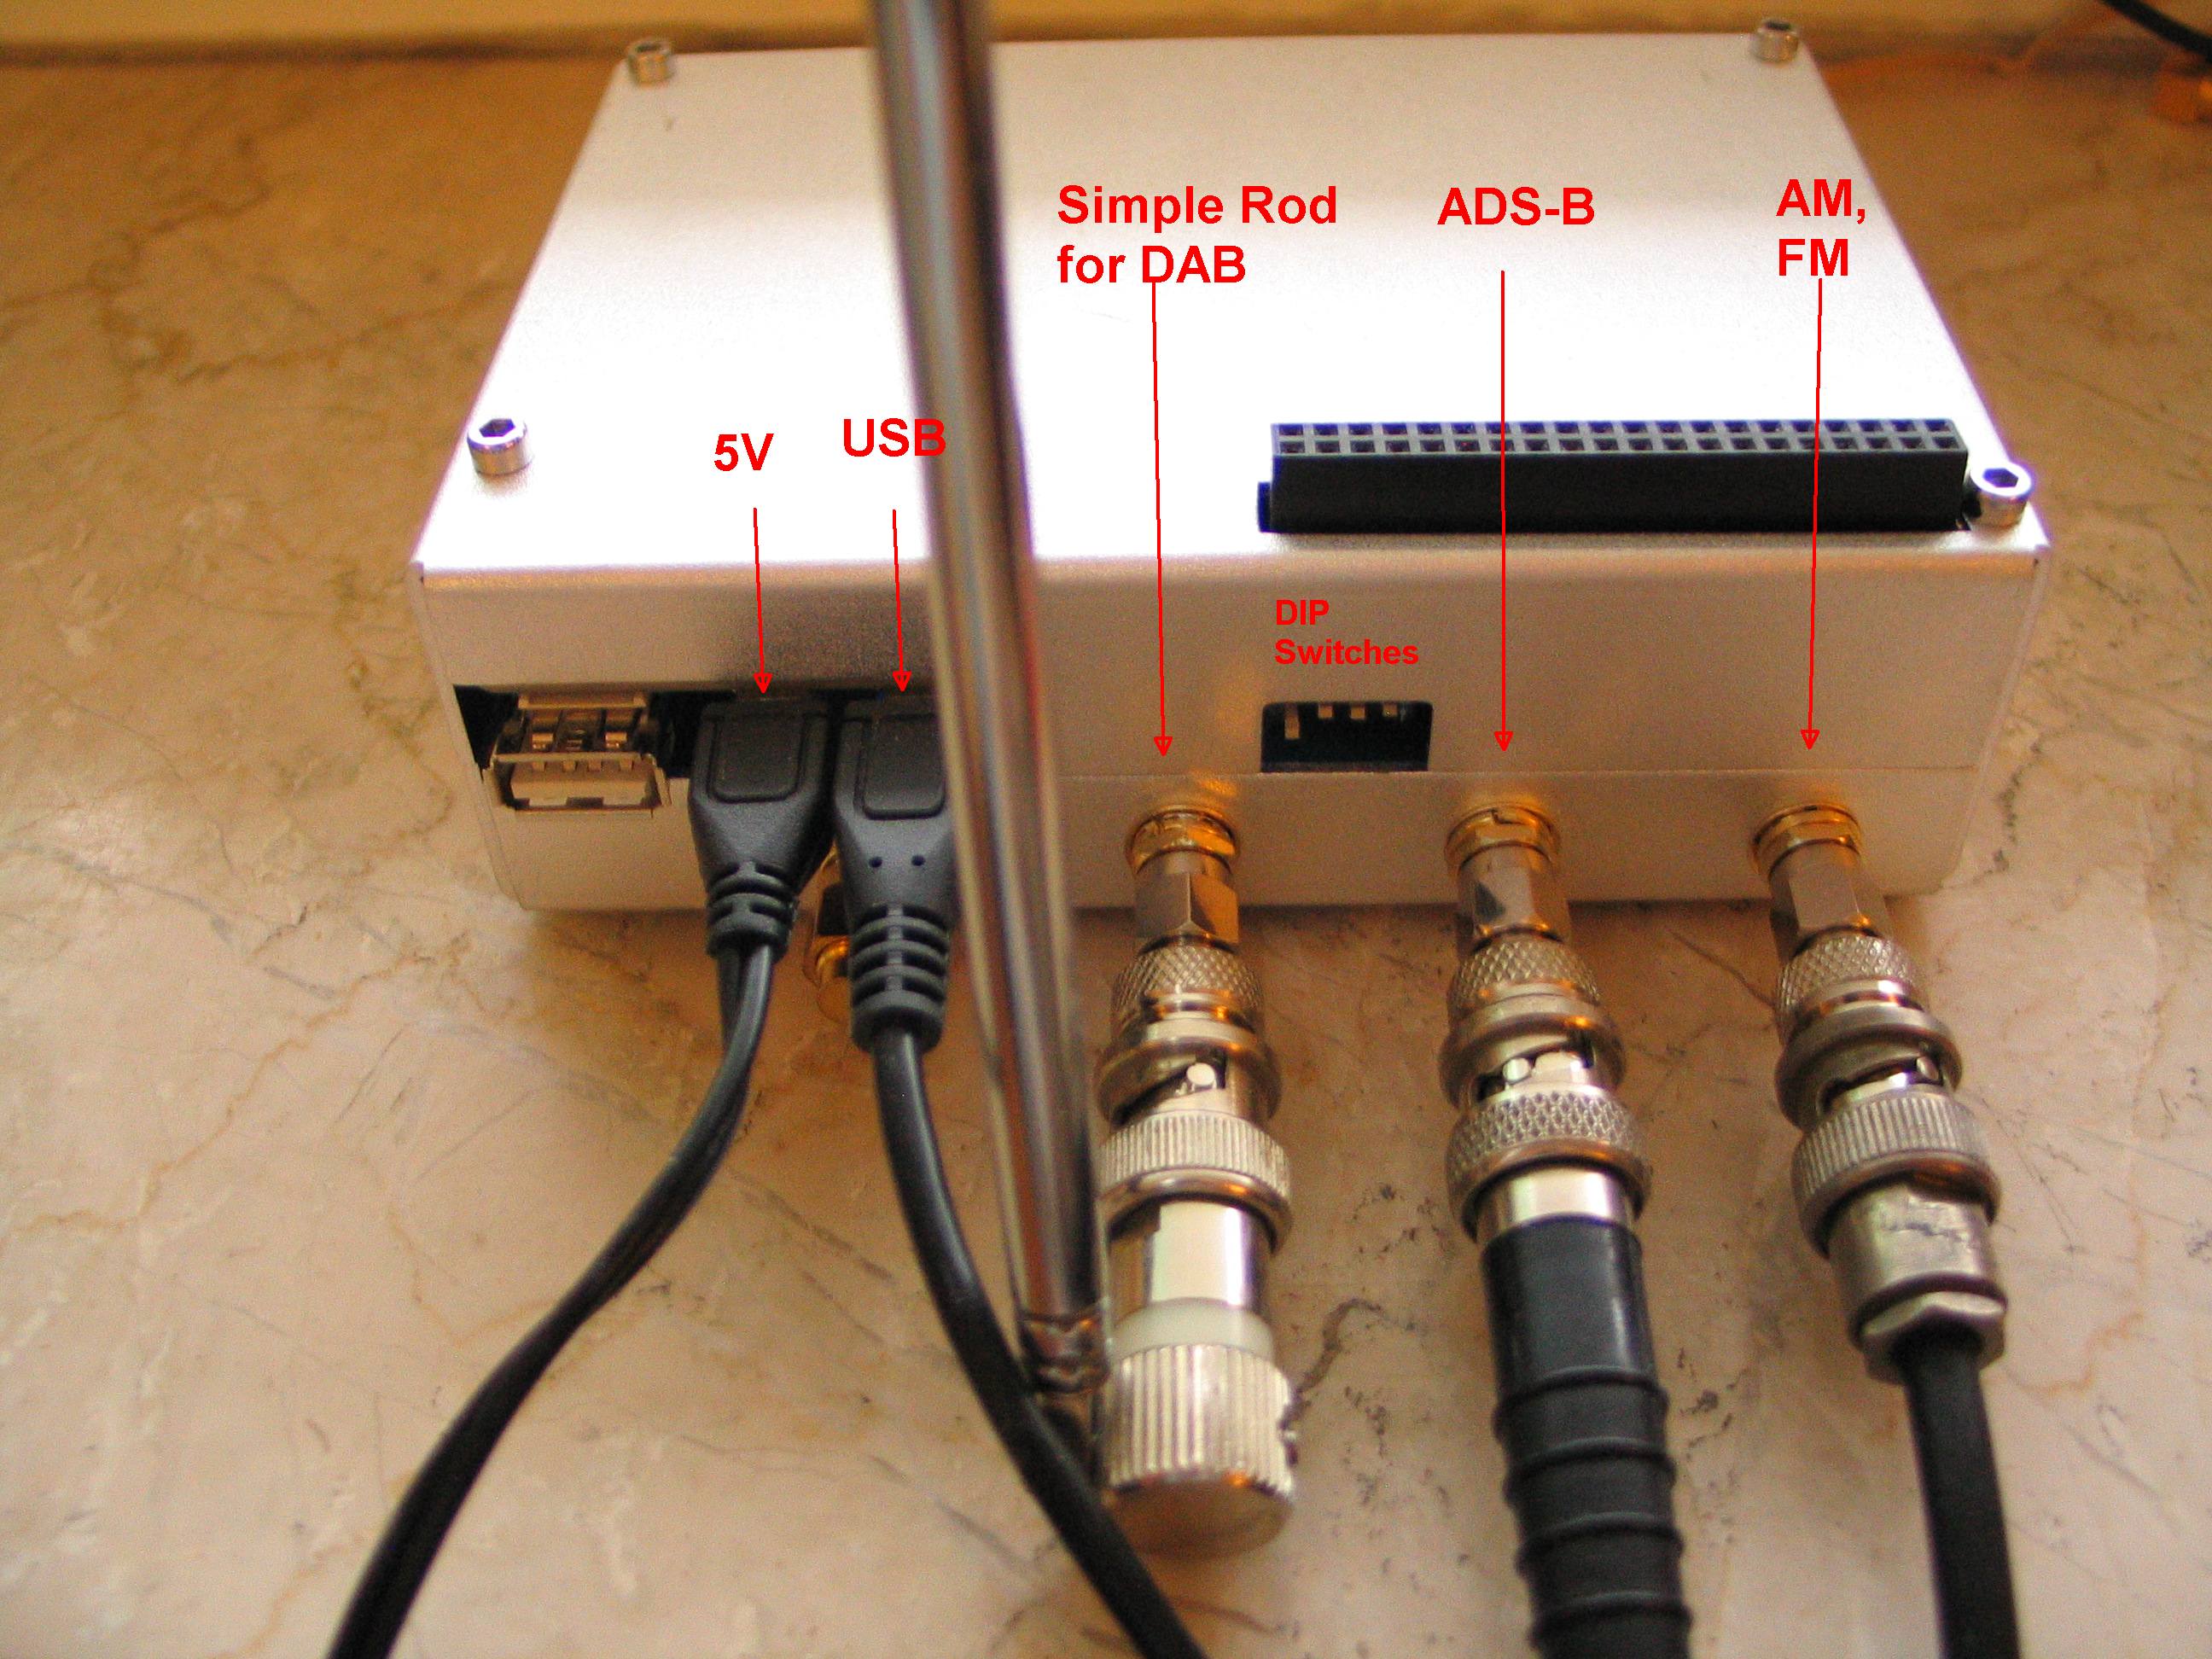
Three individually housed hardware devices were of course possible as well. -
Step 8: Start it
To start a receiver, click on the blue triangle in its top bar. Doing so for Rx1 results in something like the following picture:

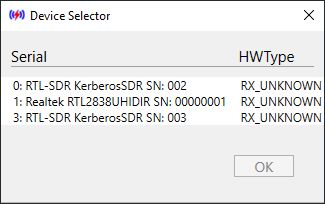
The dialog lets you select one of the four connected receivers present in this example. Select one of them, e.g. the "Kerberos SN:001".
The WFM demodulator starts and should play audio. It has been pre-configured in the default config file.
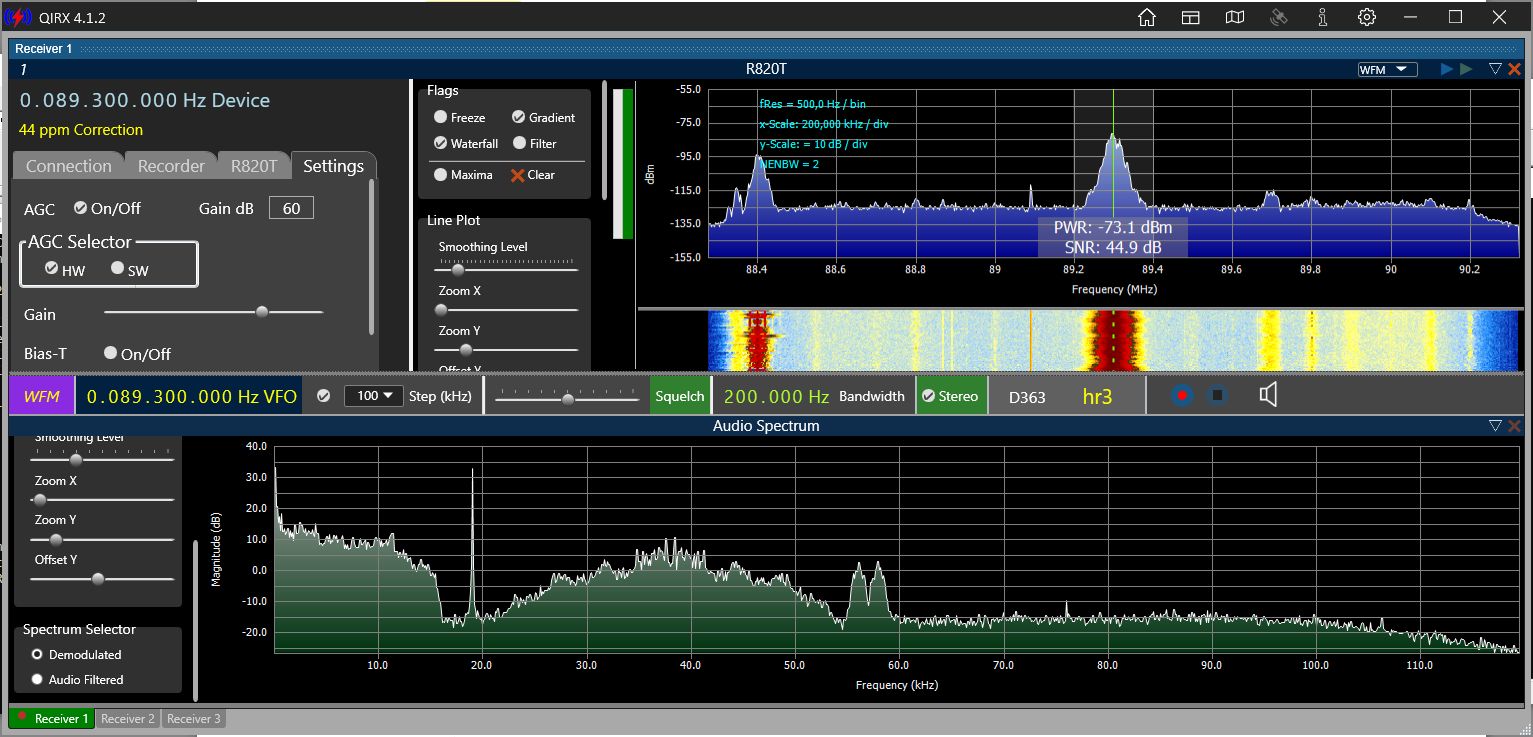
Please note the small red dot at the bottom left tab. It means "Receiver 1 is running".
Now let this receiver running and click the "Receiver 2" tab. It is pre-configured for ADS-B. After having started, it shows something like this:
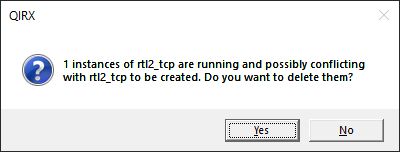
Please don't be confused by this message. Usually you should click "No". It is intended as a warning in cases where you need only one receiver and another instance of rtl_tcp might not have been closed. You might appreciate this message after being more familiar with QIRX.
After having selected "No", another selection dialog box pops up, showing three instead of four receivers, as the "Kerberos SN:001" is already busy:
After having selected Kerberos SN:002, the ADS-B receiver starts and shows immediately the "Aircraft table", successively filling up:
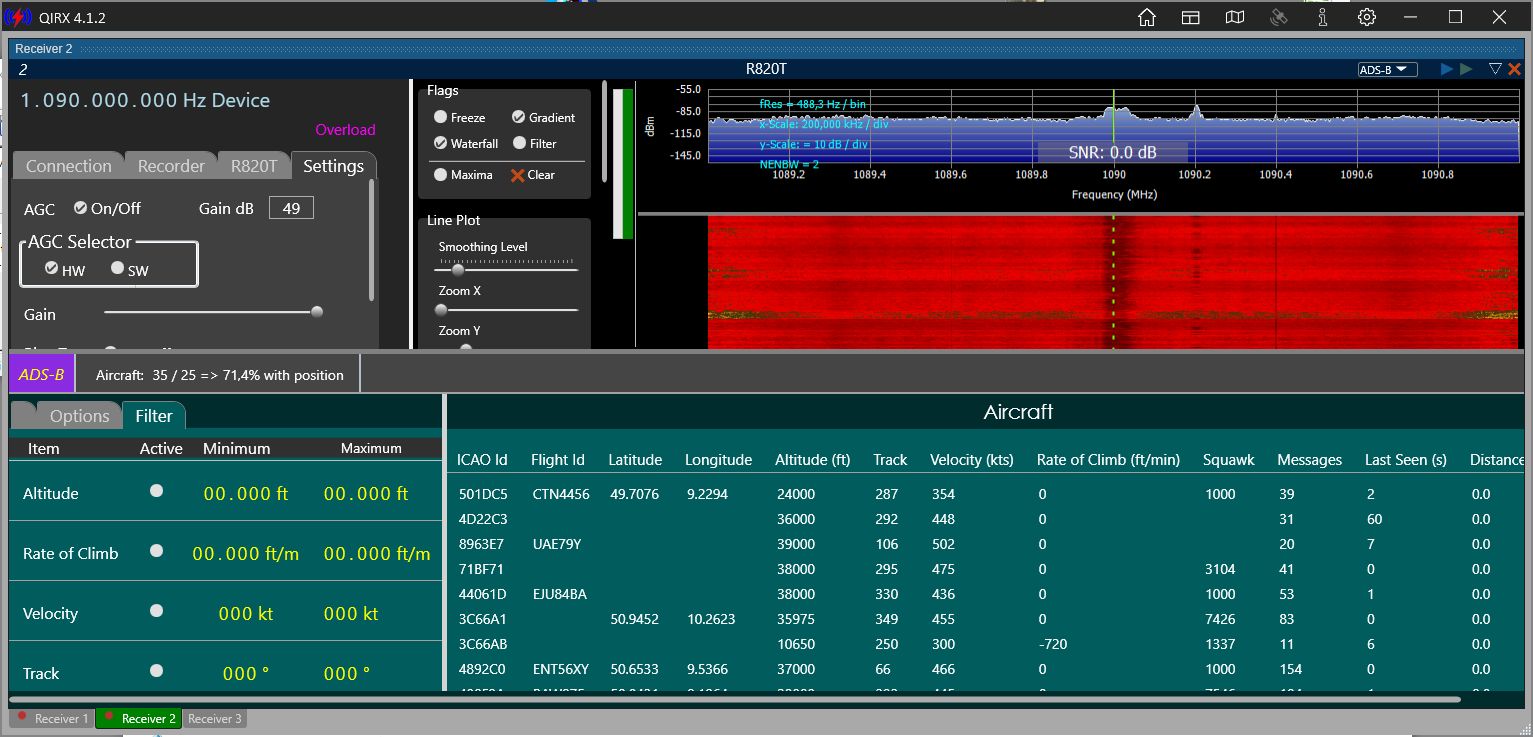
This screen shows a situation which could be cleaned up a little, e.g. by selecting a manual gain to get rid of the "Overload" indication.
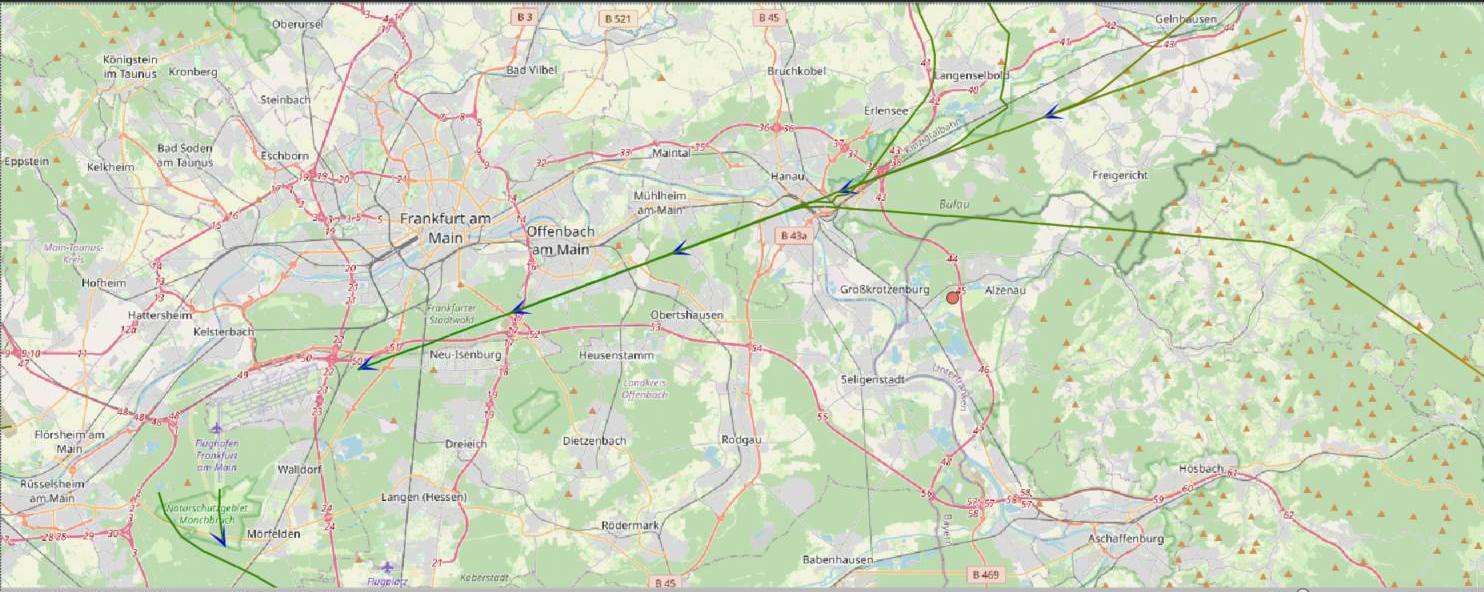
After some mouse clicks, you could have something like the following picture, showing the map, activated by clicking the "Map" icon on the top row, docked at the left side of the receiver, thanks to the docking feature having been introduced in V4:
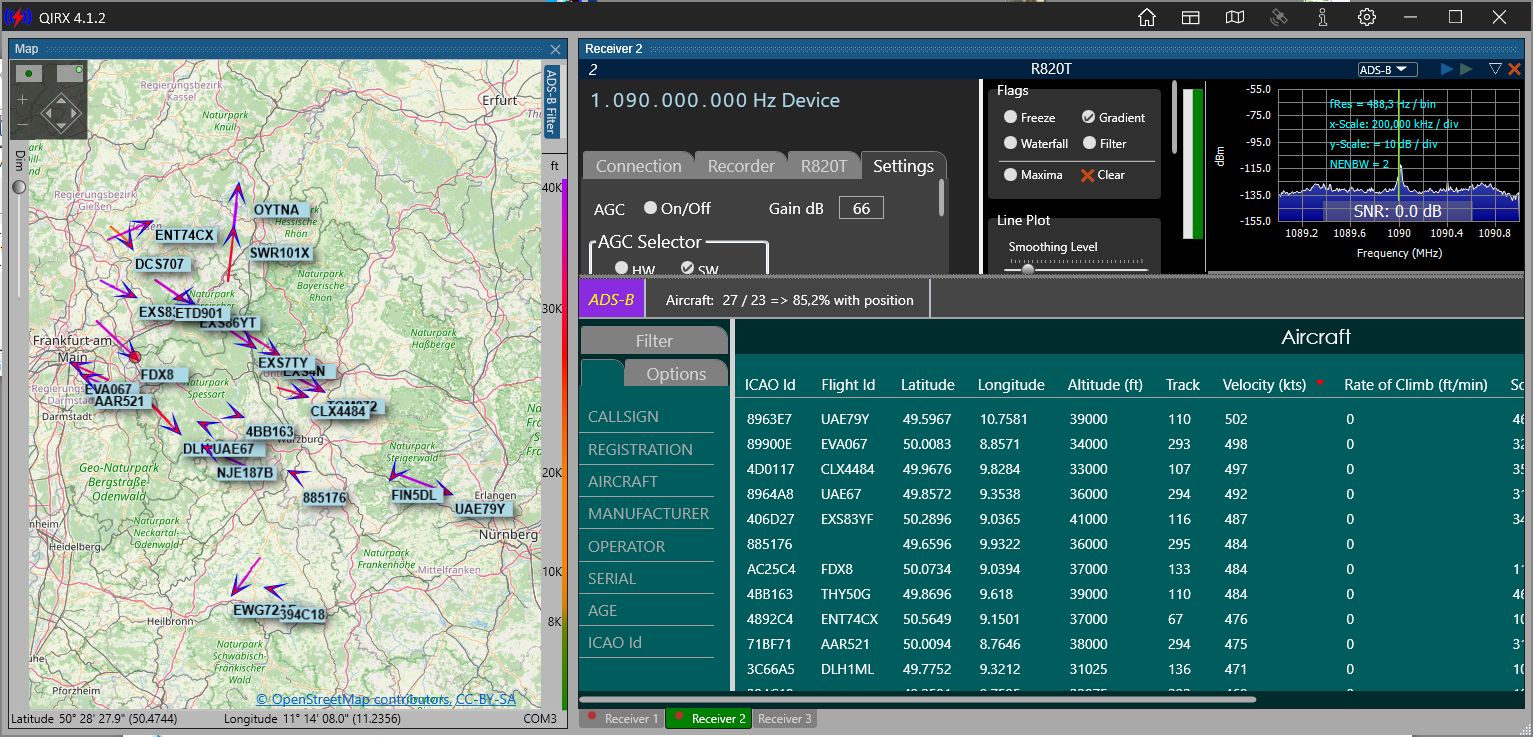
Please have a look at the bottom tabs. Two red dots, meaning two receivers are running.
Receiver 3 is still missing. I save you the selection dialog, of course doing its work again, and jump directly to the result, after having confirmed that I do not intend to stop the running rtl2_tcp drivers. Here it is, showing DAB at work, the transmitters of the selected "Dlf" service on the map, together with the aircraft:

What is still missing is the spectra on the right DAB pane. You can create them by making a selection in a context menu, becoming visible by a right mouse click. After some docking re-arrangement, the following picture shows the result of the Installation procedure and the startup of three RTL-SDR devices.
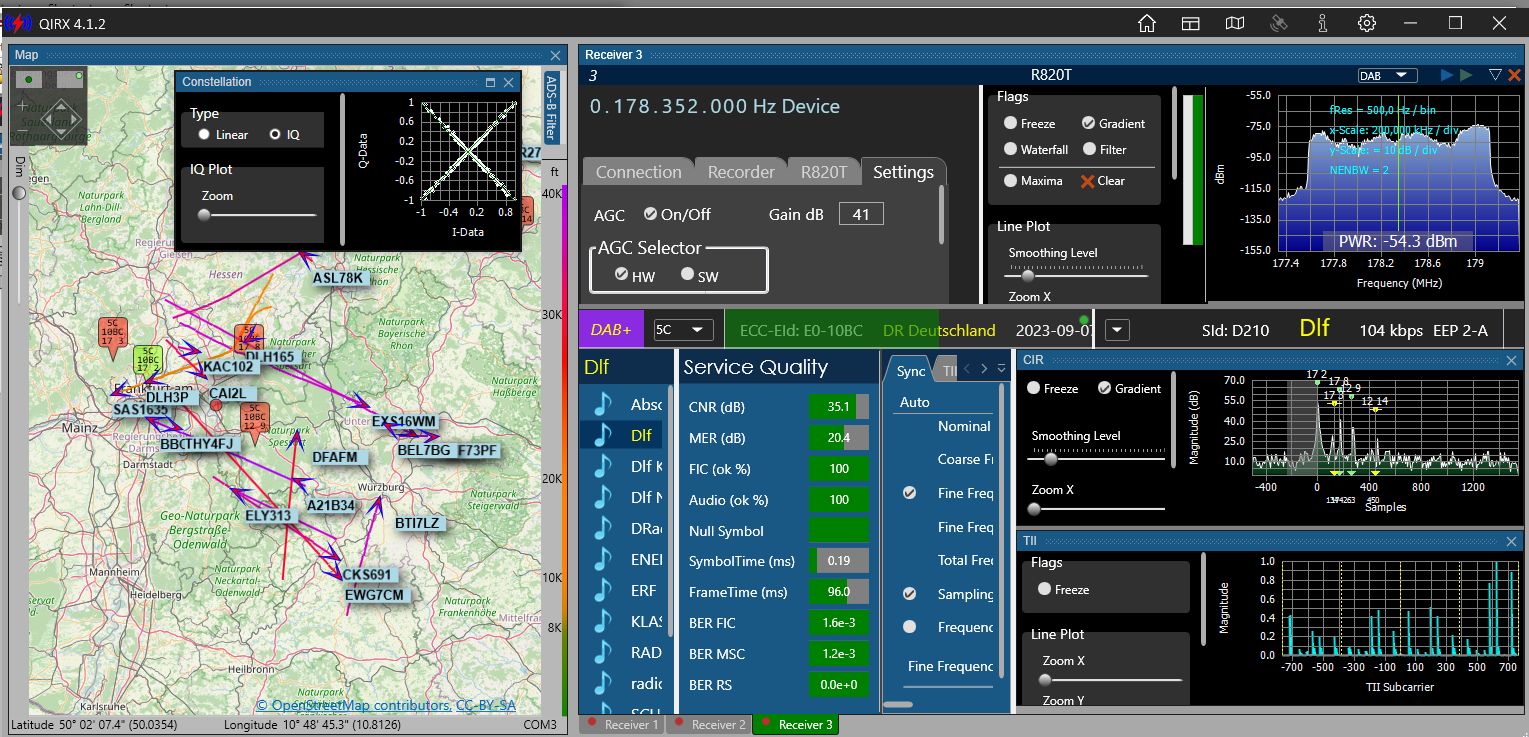
And, of course you already noticed now that three red dots are present in the bottom tabs, meaning all three receivers are running.
You are ready now to reconfigure everything as you like it according to your screen size. The layout will not be lost and should show up on the next start in the very same way as when you closed the app.
Remark: The above described procedure assumed all three receivers present locally. In case you are interested how to improve your QIRX experience by using receivers remotely, please consult the "Setup" page describing it.
-
Step 9: Check it
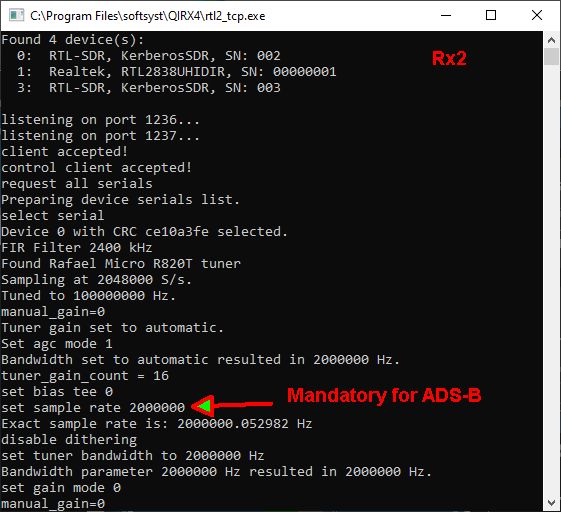
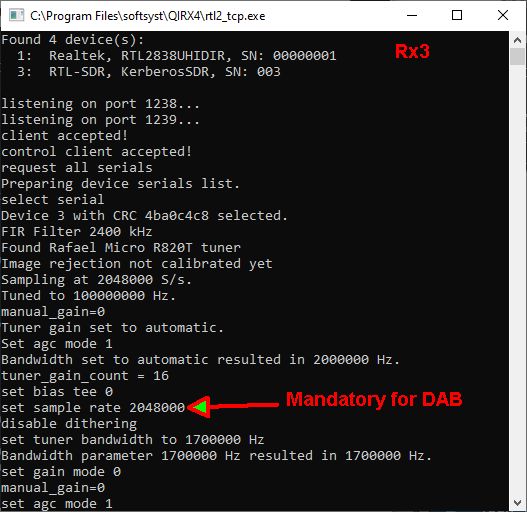
When you see something similar to the above pictures, you know all went well. If not, you might wish to have a look at each of the three instances of rtl2_tcp, being minimized in the Windows Start Bar, each with its own command-line window. Bringing them back to some reasonable size, they should somehow look like in the following pictures.
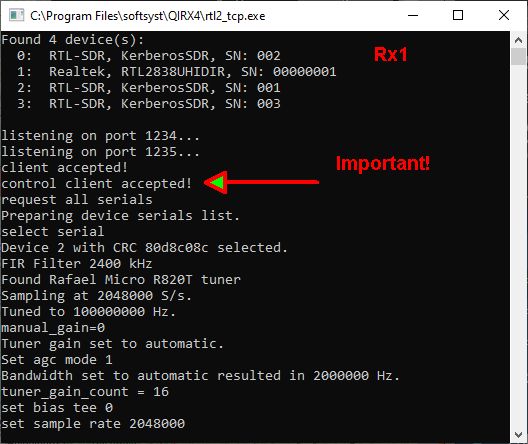
Remark: These procedures show an example how to get three receivers running simultaneously, with three different demodulators/decoders.
However, there are of course many more configurations possible. For instance, for aviation enthusiasts, an interesting one might be the following:- Rx1: AM demodulator, for listening to the pilot-ATC communication. But beware! This is not allowed in some countries like the one where I am living. Therefore, the FM broadcast demodulator was chosen for this startup demo.
- Rx2: ADS-B, as shown.
- Rx3: A second AM demodulator to listen to another ATC frequency in use.
Post-Install Steps
If you arrived here, you are done with a successful installation. However the next two steps are recommended to be done immediately, as they bring you up to speed. After these steps, QIRX must be restarted.
- DAB Database Update: On the DAB demodulator, select "Options, Update DB" and follow the instructions in the opening dialog. This will load the latest DABLIST and/or Ofcom DAB database, for a map display of the latest the transmitter locations.
- ADS-B Database Update: On the ADS-B page, select "Options, Update DB" and perform the update.
What could be done if Step 9 above does not give the desired result.
First of all, you must be sure that your installation with the Zadig driver worked properly. As mentioned elsewhere, Zadig is NOT part of the QIRX distribution. However, there are many places in the web describing the installation procedure. Now follow the procedure below and see if it results in success. And - for the following tests - stop your firewall in case you are using one.
- Try all USB ports on your machine. Often not all of them work with Zadig. This might depend on the configuration of the PC. No general rule applies.
- A common problem is the index of the USB port. You might have to select e.g. an index of 1 instead of zero in the "Settings" dialog of QIRX under "Device Index". Give it a try.
- If still no success, set the Device Index back to zero, and in the "Settings" dialog, uncheck "Autostart" and "Autostop". Now start rtl_tcp.exe or rtl2_tcp.exe manually on a command-line before clicking the blue triangle in QIRX. In this case the rtl(2)_tcp commandline window does not close when not succeeding. I assume here that you know how to start rtl(2)_tcp.exe on a command-line. rtl(2)_tcp.exe reside in the same directory where you installed QIRX.
- Look what you observe in the commandline window of rtl(2)_tcp.exe when clicking the blue triangle in QIRX. Take a screenshot.
- Usually one of the described measures results in success. If not, send me an email with a description of your actions and screenshots and I'll try to help you. However, all too often emails arrive here saying: "It doesn't work, please help". Sadly, such calls for help are useless. They will NOT be considered. To be able to help, an error description as detailed as possible is absolutely necessary.